Managing Customers
Create and manage the companies and contacts that place orders in UTX Freight.
Overview
Every order in UTX Freight is placed on behalf of a contact person from a customer company. Before you can create orders, you need at least one customer with one contact.
- Companies are the billing entities — each has an address, default rate, and statement settings.
- Contacts (People) belong to a company — they receive notifications and can log in to place orders.
- Default tags can be set per customer to automatically organize new orders.
- Fuel surcharge exemptions can be configured per customer.
- Automatic statements can be scheduled per customer.
Quick Start
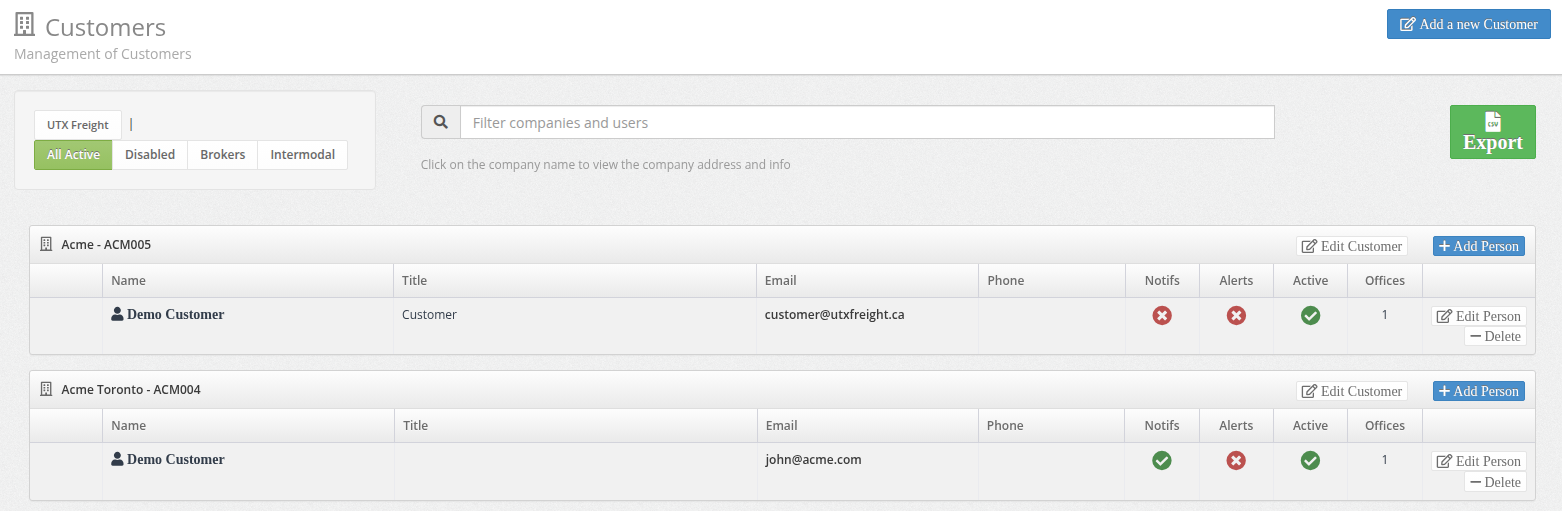
- Go to Customers from the left menu.
- Click Add a new customer at the top right.
- Enter the company name (the only required field).
- Click Save Changes.
- Back on the list, find the company and click Add Person to create a contact.
Tip
The contact will automatically receive an invitation email. If you don't want that yet, use a placeholder email like name+1@utxfreight.ca — you can change it later.
Access & Permissions
| Role | Access Level |
|---|---|
| Admin / Manager | Full access — create, edit, disable customers |
| Dispatch | View customers, limited editing (if configured) |
| Accountant | View customers |
How to get there:
- From the left menu, click Customers
Creating a Customer
- Navigate to Customers.
- Click Add a new customer.
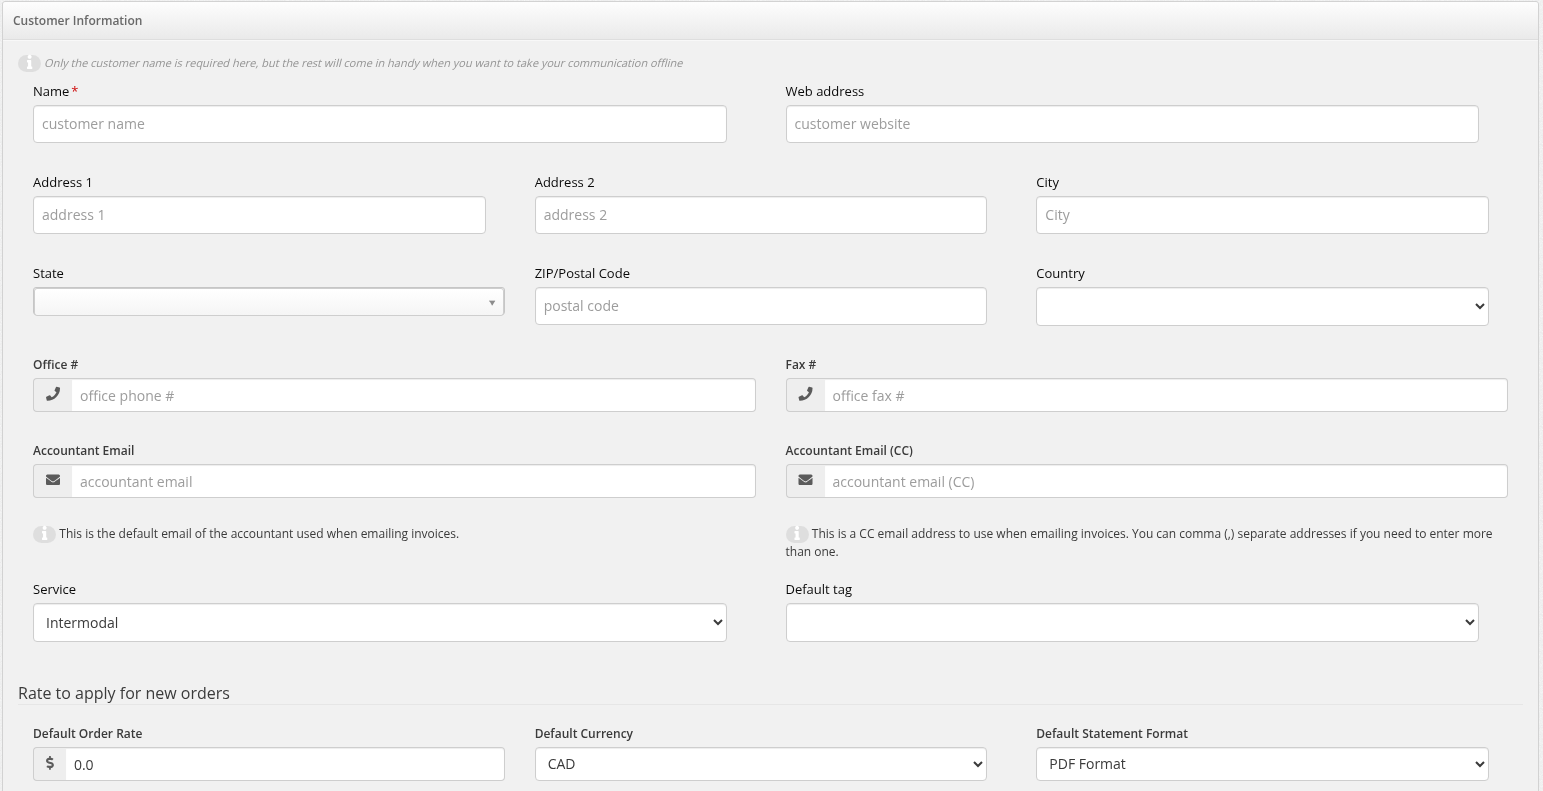
- Fill in the company details.
- Click Save Changes.
Company Information
| Field | Description |
|---|---|
| Name | Company name (required) |
| Web Address | Company website |
| Address 1 / Address 2 | Street address |
| City | City name |
| State / Province | Select from dropdown |
| ZIP / Postal Code | Postal or ZIP code |
| Country | Canada (CA) or United States (US) |
| Office # | Phone number |
| Fax # | Fax number |
Email Settings
| Field | Description |
|---|---|
| Accountant Email | Primary email for invoices and statements |
| Accountant Email (CC) | CC address for invoice emails (comma-separated for multiple) |
Rate & Billing
| Field | Description |
|---|---|
| Service | Service type for this customer |
| Default Order Rate | The default base rate applied to new orders for this customer |
| Default Currency | CAD or USD |
| Default Statement Format | Format for automatic statement emails |
Adding Contact People
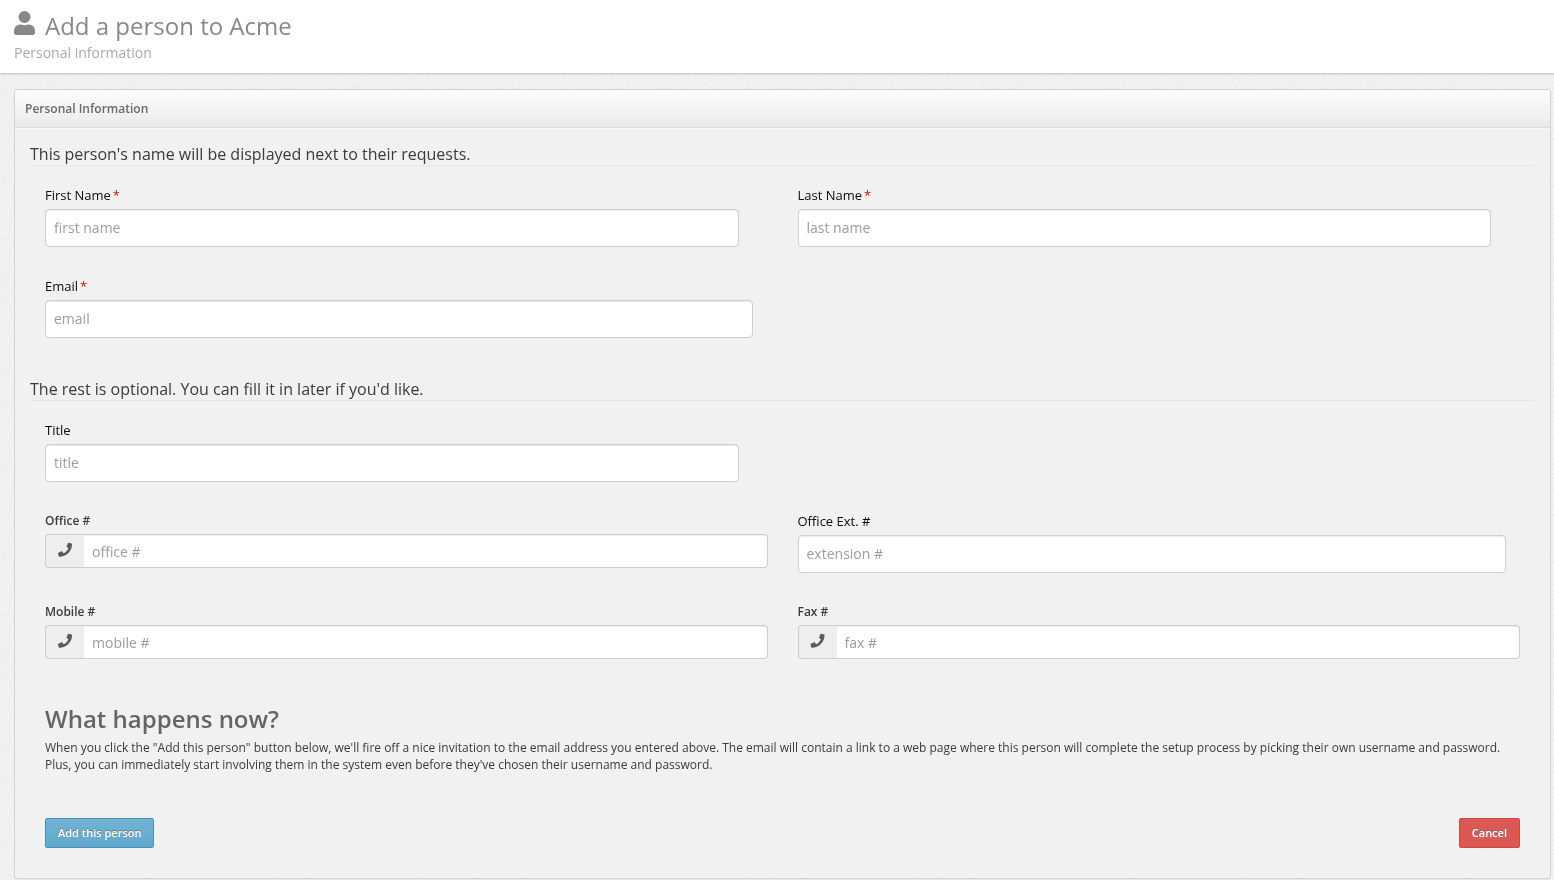
Once a company exists, add contacts who will be associated with orders:
- On the Customers list, find the company.
- Click Add Person.
- Fill in First name, Last name, and Email.
- Click Save Changes.
Invitation email
Adding a person triggers an automatic invitation email. The contact can then log in and place orders. Use a placeholder email if you want to delay this.
Editing a Customer
- On the Customers list, click the company name to expand it.
- Click the Edit customer button.
- Update the fields as needed.
- Click Save Changes.
Default Tag
If the Tagging addon is enabled, you can set a Default Tag for the customer. This tag is automatically applied to every new order created for this customer.
Fuel Surcharge Exemption
If the Fuel Surcharge addon is enabled, you will see a Fuel Surcharge section on the edit form:
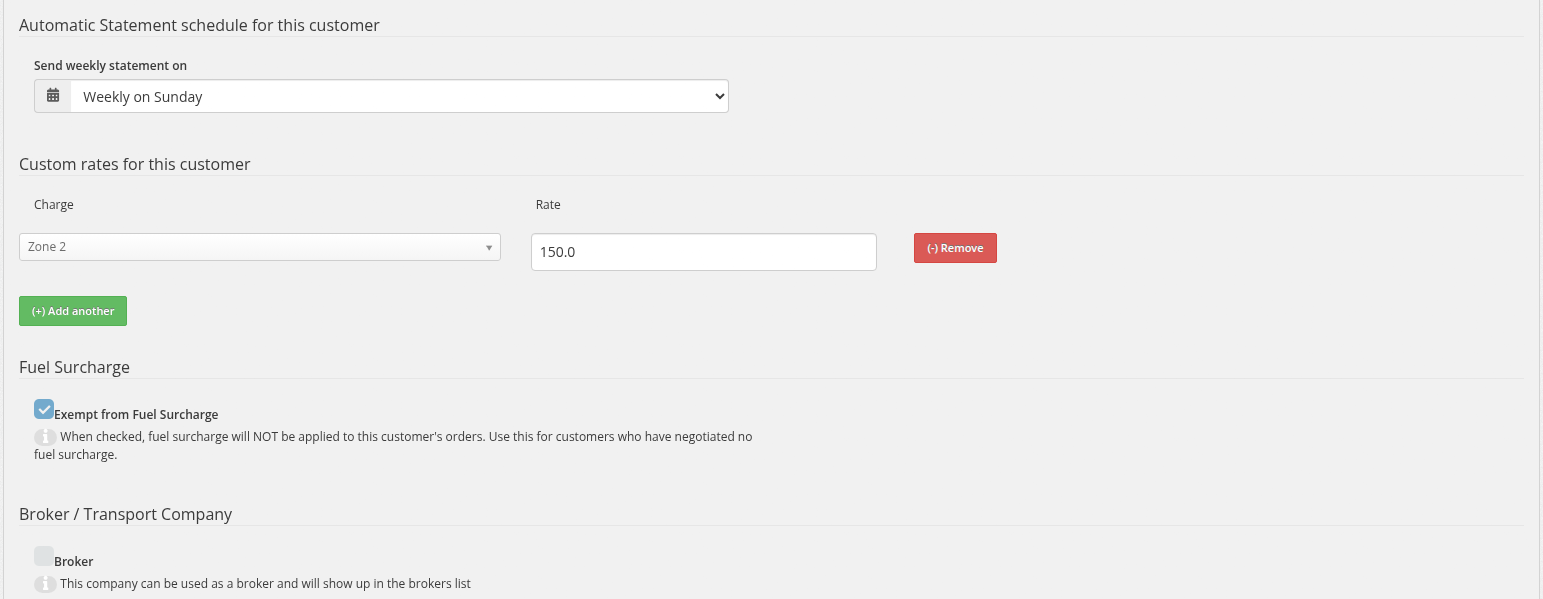
- Check Exempt from Fuel Surcharge to exclude this customer from all fuel charges.
- After saving, go to Fuel Schedule and click Recalculate on affected months to remove existing charges.
For full details, see Fuel Surcharge — Exempting a Customer.
Automatic Statement Schedule
If the Automatic Statements addon is enabled, you can set the delivery day:
- On the customer edit form, select a day from the Send weekly statement on dropdown.
- The statement email is sent automatically on that day if the customer has an outstanding balance.
For full details, see Automatic Statements.
Custom Rates
Set zone-based custom rates for the customer. Select the Zone and enter the Rate, then click Add another to add more.
Filtering the Customer List
The sidebar on the Customers page provides quick filters:
| Filter | What It Shows |
|---|---|
| All Active | All enabled customer companies |
| Disabled | Deactivated companies (hidden from order forms) |
| Brokers | Companies flagged as brokers |
Use the search box at the top to filter by company name or contact name.
Exporting Customers
Click the Export button to download the customer list as a CSV file. The export includes all active companies with their contact information.
Disabling a Customer
Disabled customers no longer appear in dropdown menus when creating orders. To disable:
- Edit the customer.
- Uncheck the Active checkbox.
- Click Save Changes.
The customer and all their historical orders remain in the system — they are just hidden from new order forms.
FAQ / Troubleshooting
Customer doesn't appear in the order form dropdown
Solution
The customer may be disabled. Go to Customers, use the Disabled filter in the sidebar, find the company, and re-enable it.
Contact didn't receive the invitation email
Solution
You can resend the invitation from the customer list. Find the contact and click the Resend Invitation link.
Broker / Transport Company
Check Broker to flag this company as a broker. Broker companies appear under the Brokers filter on the Customers list.